How to take a photo from a painting

It might look easy but it is likely to become a very annoying and frustrating experience. Beginning with the easiest to toughest issues:
1. Focus issues at corners
If painting is larger than A3. Depending on the camera we have there is a chance that we may be able to compensate the loss of focus at the corners by setting the blend to f/8 or f/11. This should do the trick for paintings up to 60 x 80 cm.
2. Wide lenses
We shouldn't use wide lenses at all. Wide lenses allow us to take a photo from a closer distance but lead to irreparable defects in the image such as bulging the sides of the rectangle as if the picture was pasted on a sphere - so called "barrel distortion" effect. If we take dslr cameras for a reference then the most inappropriate lenses would be up to 24mm focal length. 35mm is a possible compromise. 50мм is ideal but we often can't afford to go back that far to catch the whole painting.
3. Proper lighting
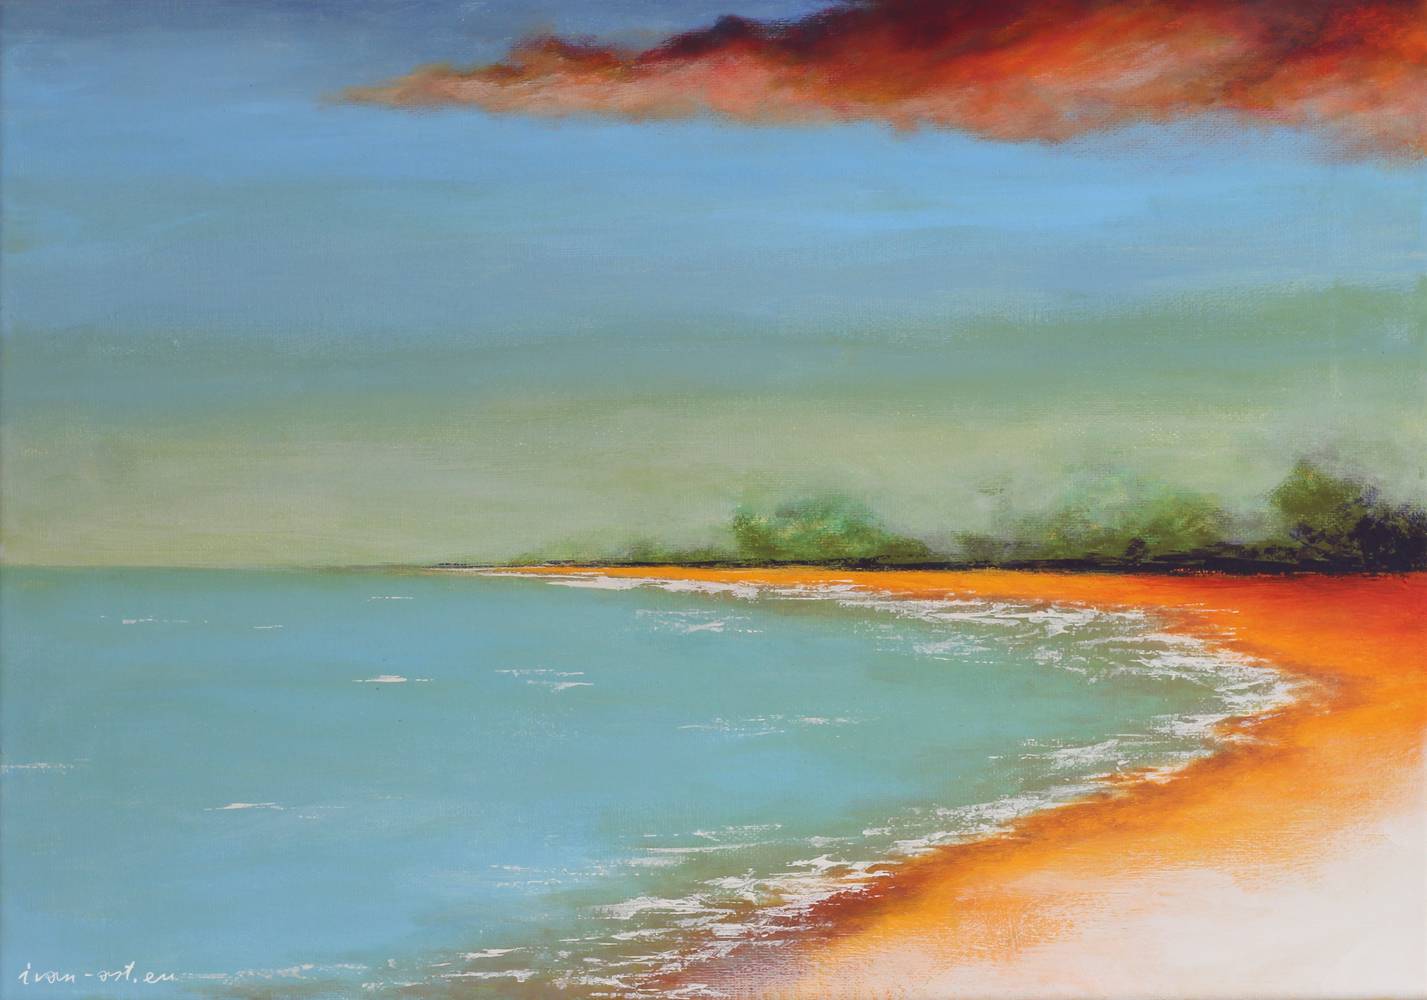
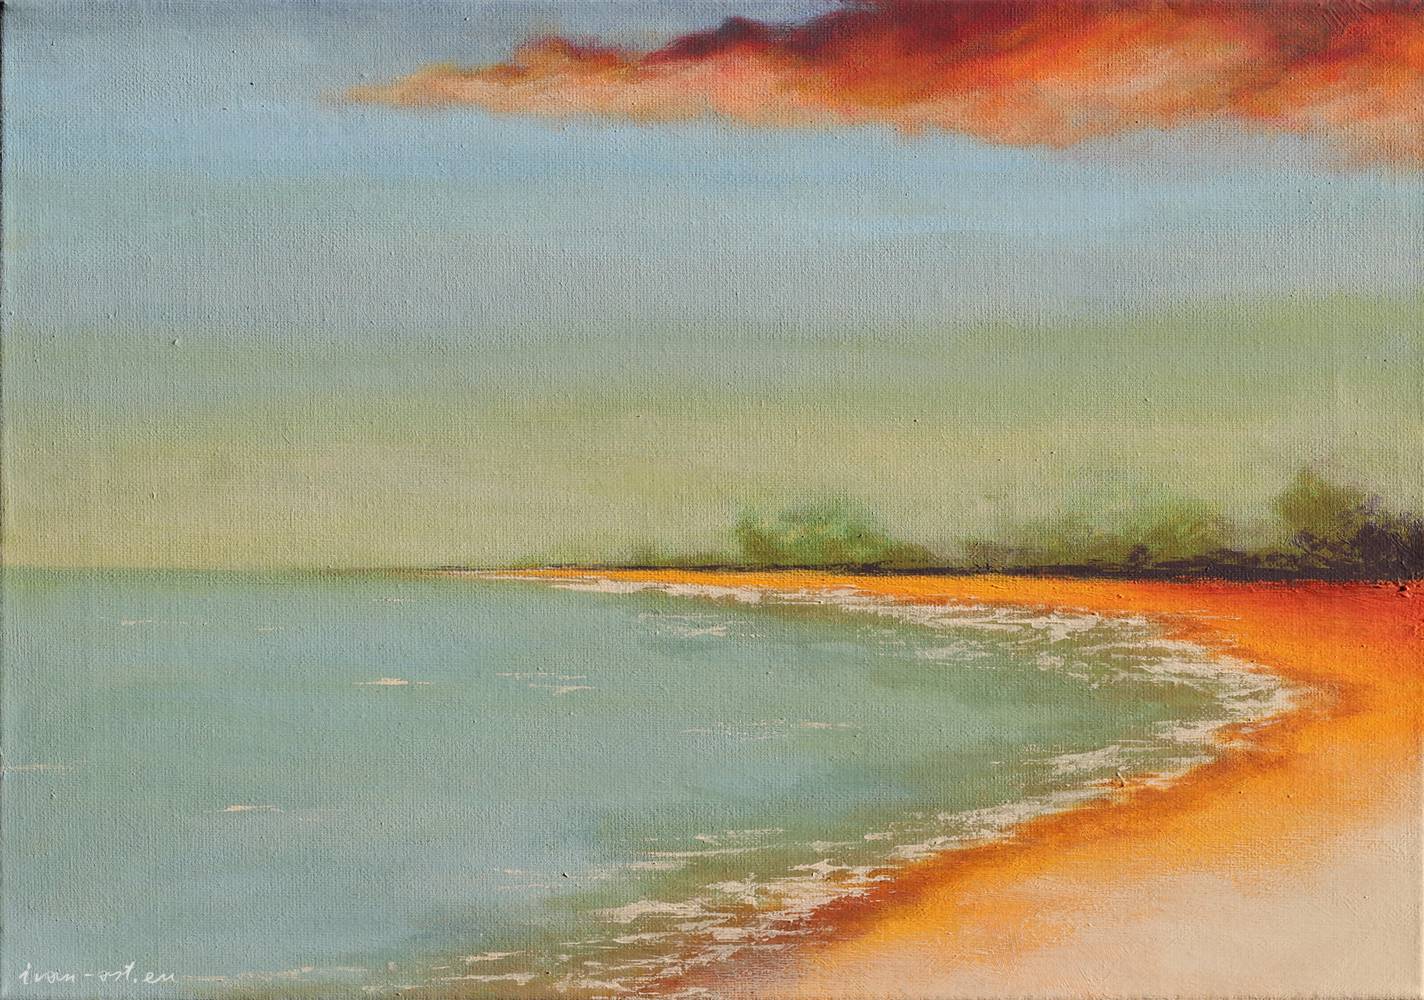
You either have to have professional lighting or wait for a sunny day with clear skies. *Best results are obtained when the sun's rays hit the painting from the left or right, at a 45 degree angle to bring out the relief of the canvas and the paint. Lighting shouldn't come from behind us - the relief will not be visible, and the paint will begin to shine in places. Samle photos are taken from a single painting using the same camera. Difference is only in lighting temperature and direction angle. The result is so different that in one case the painting looks like a printed copy.
* the ideal case of point 3 most often does not work for varnished paintings
4. Shooting at a right angle
Very often when we take a picture we will rotate the camera or stand at a wrong angle to the picture - for example 89 degrees instead of 90, even if we use a tripod. Thus, the rectangular shape of the picture can resemble a trapezoid. Fortunately, there is an easy software solution to this problem so that the trapezoidal shape of the image becomes a rectangle again as if the camera was completely perpendicular to the picture plane. In the old versions of the Darktable program, the function was called keystone correction and is located in the "crop and rotate" module. In the new versions of Darktable there is some change and now there is a separate module for straightening the perspective called "perspective correction".
5. Paints with gloss or varnished paintings
Some acrylic paints dry very glossy instead of staying matte. A glossy effect is also obtained if we have added a glossy medium, or varnished the picture with a medium or varnish at the end. All of this makes it very difficult to photograph because there are always areas of the picture that reflect light and appear brighter. The only way to minimize the effect is to take several photos of the painting from different places in the room and at different times of the day, and then process the pictures with software. A suitable filter is "shadows and highlights" in the Darktable program, with which we can improve the relative perception of the photo by some 20-30%.